鸽了很久的GAN实战…

数据集准备
需要的是动漫人物头像的数据,事实上有现成的,比如参考的repo中提供了网盘链接,也可以自己制作.我这里就自己制作算了,毕竟要走完一个流程.
首先找到一堆带有高清人物头像的数据并不困难,但是需要提出头像,这里就需要图像分割,使用别人利用opencv或者深度学习模型得到的detector切割出头像即可.
爬取图像数据可以使用Bionus/imgbrd-grabber: Very customizable imageboard/booru downloader with powerful filenaming features. (github.com)这个软件,之前使用diffusion model炼丹的时候LoRA Training Guide (rentry.co)用过,可以说是非常舒爽简单,或者使用mikf/gallery-dl: Command-line program to download image galleries and collections from several image hosting sites (github.com),直接pip下载即可1
python3 -m pip install -U gallery-dl
然后使用相关命令1
gallery-dl --range 1:1000 "https://danbooru.donmai.us/posts?tags=misaka_mikoto"
这样可能还是会下载到视频,所以可以使用--filter file_ext == 'png' or file_ext == 'jpg'来过滤. 比如1
2gallery-dl --range 1001:5000 --filter "file_ext == 'png' or file_ext == 'jpg'" "https://danbooru.donmai.us/
posts?tags=misaka_mikoto"
下载指定网址的一个范围的图片,这里有1000张,但像MNIST这种数据集训练都有60000张,所以最好还是弄多点.另外gallery-dl作为一个二次元图片爬虫还是很不错的,以后应该常用,

然后使用一个分割器,python也有相关的库nya3jp/python-animeface: A library to detect anime faces in images. (github.com),也可以考虑使用别人训练好的detector.
如果使用后者,遇到类似需要rebuild library的报错需要装下面的库.而前者貌似在windows上不太行.1
pip install opencv-contrib-python
1
2
3
4
5
6
7
8
9
10
11
12
13
14
15
16
17
18
19
20
21
22
23
24
25
26
27
28
29
30
31
32
33import cv2
import sys
import os.path
def detect(filename, cascade_file="./lbpcascade_animeface.xml"):
if not os.path.isfile(cascade_file):
raise RuntimeError("%s: not found" % cascade_file)
cascade = cv2.CascadeClassifier(cascade_file)
image = cv2.imread(filename, cv2.IMREAD_COLOR)
gray = cv2.cvtColor(image, cv2.COLOR_BGR2GRAY)
gray = cv2.equalizeHist(gray)
faces = cascade.detectMultiScale(
gray,
# detector options
scaleFactor=1.1,
minNeighbors=5,
minSize=(24, 24),
)
for (x, y, w, h) in faces:
cv2.rectangle(image, (x, y), (x + w, y + h), (0, 0, 255), 2)
cv2.imshow("AnimeFaceDetect", image)
cv2.waitKey(0)
cv2.imwrite("out.png", image)
if __name__ == "__main__":
detect(
"../gallery-dl/danbooru/misaka_mikoto/danbooru_4831620_03359e23330ae19467b0b772b62cd89b.jpg"
)
结果如下,上面代码的faces就是四个坐标画出bounding,可以直接利用这个坐标切割.
也就是类似下面这样,注意数据类型是H,W,C.1
2
3for (x, y, w, h) in faces:
# cv2.rectangle(image, (x, y), (x + w, y + h), (0, 0, 255), 2)
image = image[y : y + h, x : x + w]
此外也有可能识别不出头像(或者是爬取的图本身就有点问题),如果识别区与超出图像就跳过,就改成下面这样1
2
3
4
5
6
7
8
9
10
11
12
13
14
15
16
17
18
19
20
21
22
23
24
25
26
27
28
29
30
31
32
33
34
35
36
37
38
39
40
41
42
43
44
45
46
47
48
49import cv2
import os.path
from tqdm import tqdm
def detect(filename, cascade_file="./lbpcascade_animeface.xml"):
if not os.path.isfile(cascade_file):
raise RuntimeError("%s: not found" % cascade_file)
cascade = cv2.CascadeClassifier(cascade_file)
image = cv2.imread(filename, cv2.IMREAD_COLOR)
gray = cv2.cvtColor(image, cv2.COLOR_BGR2GRAY)
gray = cv2.equalizeHist(gray)
faces = cascade.detectMultiScale(
gray,
# detector options
scaleFactor=1.1,
minNeighbors=5,
minSize=(24, 24),
)
if len(faces) > 0:
for (x, y, w, h) in faces:
# cv2.rectangle(image, (x, y), (x + w, y + h), (0, 0, 255), 2)
image = image[int(y - 0.1 * h) : int(y + 0.9 * h), x : x + w]
height, width, _ = image.shape
if height > 0 and width > 0:
image = cv2.resize(image, (64, 64))
dir_path = "../assets/misaka_mikoto"
cv2.imwrite(
dir_path
+ "/crop_"
+ filename.split("_")[-2]
+ "."
+ filename.split(".")[-1],
image,
)
else:
return
else:
return
if __name__ == "__main__":
# 遍历某个目录
for root, dirs, files in os.walk("../gallery-dl/danbooru/misaka_mikoto"):
pbar = tqdm(files)
for idx, file in enumerate(pbar):
pbar.set_postfix(index=idx, file=file)
if not file.startswith("crop") and not file.endswith(".part"):
detect(os.path.join(root, file))
这样数据就处理好了.可以参考Anime-Face-Dataset/src at master · bchao1/Anime-Face-Dataset (github.com).
当然也存在一些问题,比如这里使用的是根据图库tag搜索图像,但打了这个tag的图像可能还会有其他任务角色,这样就可能把其他人物分割出来.
所以后续可以考虑使用一个专门的高精度识别分割器,专门用于提取某个人物.此外处理时最好写个try-catch丢弃错误,不然一旦哪张图出错又要重新来,或者写个出错时计数的值,接着那个值继续.
DataLoader
可以自定义数据1
2
3
4
5
6
7
8
9
10
11
12
13
14
15
16
17
18
19
20from torchvision import transforms
from torch.utils.data import DataLoader, Dataset
import torch
import torch.nn as nn
class AnimeDataset(Dataset):
def __init__(self):
super().__init__()
pass
def __getitem__(self, index):
# 根据索引返回数据
# data = self.preprocess(self.data[index]) # 如果需要预处理数据的话
return self.data[index]
def __len__(self):
pass
def preprocess(self, data):
# 将data 做一些预处理
pass
比如1
2
3
4
5
6
7
8
9
10
11
12
13
14
15
16
17
18
19
20class Pic_Data(Dataset): #继承Dataset
def __init__(self, root_dir, transform=None): #__init__是初始化该类的一些基础参数
self.root_dir = root_dir #文件目录
self.transform = transform #变换
self.images = os.listdir(self.root_dir)#目录里的所有文件
def __len__(self):#返回整个数据集的大小
return len(self.images)
def __getitem__(self,index):#根据索引index返回dataset[index]
image_index = self.images[index]#根据索引index获取该图片
img_path = os.path.join(self.root_dir, image_index)#获取索引为index的图片的路径名
img = Image.open(img_path)# 读取该图片
label = int(image_index[-5])# 根据该图片的路径名获取该图片的label
if self.transform:
sample = self.transform(img)#对样本进行变换
return sample,label#返回该样本
transform_fn=Compose([ToTensor(), Normalize(mean=(0.1307,),std=(0.3081,))])
train_data = Pic_Data("./data/MNIST/train", transform=transform_fn)
test_data = Pic_Data("./data/MNIST/test")
但是可以使用ImageFolder直接得到data.1
2
3
4from torchvision import datasets
train_data = datasets.ImageFolder(root=train_dir, # target folder of images
transform=data_transform, # transforms to perform on data (images)
target_transform=None)
比如下面这样1
2
3
4
5
6
7
8
9
10
11
12
13
14
15
16
17
18import torch
import torch.nn as nn
from torch.utils.data import DataLoader, Dataset
from torchvision import transforms
from torchvision import datasets
epoch = 500
batch_size = 64
lr = 0.0002
z_dim = 100
transform = transforms.Compose([transforms.ToTensor(), transforms.Normalize()])
animeFaceDataset = datasets.ImageFolder(
root="../assets/misaka_mikoto", transform=transform
)
dataloader = DataLoader(animeFaceDataset, batch_size=64, shuffle=True)
推荐有空做完这个教程04. PyTorch Custom Datasets - Zero to Mastery Learn PyTorch for Deep Learning 由于目前并不需要label,因为没有什么类别划分,所以先就这样,后续可以设计不同人物不同类别,这就是label信息可以用于conditionGAN等.
设计模型
使用DCGAN,WGAN啥的无所谓,github上都有现成模型.
关键是DataLoader肯定要把图片大小弄成一样的.这里使用DCGAN1
2
3
4
5
6
7
8
9
10
11
12
13
14
15
16
17
18
19
20
21
22
23
24
25
26
27
28
29
30
31
32
33
34
35
36
37
38# Generator
class Generator(nn.Module):
"""
Input shape: (batch, in_dim)
Output shape: (batch, 3, 64, 64)
"""
def __init__(self, in_dim, feature_dim=64):
super().__init__()
#input: (batch, 100)
self.l1 = nn.Sequential(
nn.Linear(in_dim, feature_dim * 8 * 4 * 4, bias=False),
nn.BatchNorm1d(feature_dim * 8 * 4 * 4),
nn.ReLU()
)
self.l2 = nn.Sequential(
self.dconv_bn_relu(feature_dim * 8, feature_dim * 4), #(batch, feature_dim * 16, 8, 8)
self.dconv_bn_relu(feature_dim * 4, feature_dim * 2), #(batch, feature_dim * 16, 16, 16)
self.dconv_bn_relu(feature_dim * 2, feature_dim), #(batch, feature_dim * 16, 32, 32)
)
self.l3 = nn.Sequential(
nn.ConvTranspose2d(feature_dim, 3, kernel_size=5, stride=2,
padding=2, output_padding=1, bias=False),
nn.Tanh()
)
self.apply(weights_init)
def dconv_bn_relu(self, in_dim, out_dim):
return nn.Sequential(
nn.ConvTranspose2d(in_dim, out_dim, kernel_size=5, stride=2,
padding=2, output_padding=1, bias=False), #double height and width
nn.BatchNorm2d(out_dim),
nn.ReLU(True)
)
def forward(self, x):
y = self.l1(x)
y = y.view(y.size(0), -1, 4, 4)
y = self.l2(y)
y = self.l3(y)
return y1
2
3
4
5
6
7
8
9
10
11
12
13
14
15
16
17
18
19
20
21
22
23
24
25
26
27
28
29
30
31
32
33
34
35
36
37
38
39
40
41
42
43
44
45
46
47# Discriminator
class Discriminator(nn.Module):
"""
Input shape: (batch, 3, 64, 64)
Output shape: (batch)
"""
def __init__(self, in_dim, feature_dim=64):
super(Discriminator, self).__init__()
# input: (batch, 3, 64, 64)
"""
NOTE FOR SETTING DISCRIMINATOR:
Remove last sigmoid layer for WGAN
"""
self.l1 = nn.Sequential(
nn.Conv2d(
in_dim, feature_dim, kernel_size=4, stride=2, padding=1
), # (batch, 3, 32, 32)
nn.LeakyReLU(0.2),
self.conv_bn_lrelu(feature_dim, feature_dim * 2), # (batch, 3, 16, 16)
self.conv_bn_lrelu(feature_dim * 2, feature_dim * 4), # (batch, 3, 8, 8)
self.conv_bn_lrelu(feature_dim * 4, feature_dim * 8), # (batch, 3, 4, 4)
nn.Conv2d(feature_dim * 8, 1, kernel_size=4, stride=1, padding=0),
nn.Sigmoid(),
)
self.apply(weights_init)
def conv_bn_lrelu(self, in_dim, out_dim):
"""
NOTE FOR SETTING DISCRIMINATOR:
You can't use nn.Batchnorm for WGAN-GP
Use nn.InstanceNorm2d instead
"""
return nn.Sequential(
nn.Conv2d(in_dim, out_dim, 4, 2, 1),
nn.BatchNorm2d(out_dim),
nn.LeakyReLU(0.2),
)
def forward(self, x):
y = self.l1(x)
y = y.view(y.size(0), -1)
return y1
2
3
4
5
6
7
8
9
10
11
12
13
14
15
16
17
18
19
20
21
22
23
24
25
26
27
28
29
30
31
32
33
34
35
36
37
38
39
40
41def train():
G = Generator(100).cuda()
D = Discriminator(3).cuda()
criterion = nn.BCELoss()
opt_D = torch.optim.Adam(D.parameters(), lr=1e-4, betas=(0.5, 0.999))
opt_G = torch.optim.Adam(G.parameters(), lr=1e-4, betas=(0.5, 0.999))
for e, epoch in enumerate(range(epochs)):
progressbar = tqdm(dataloader)
progressbar.set_description(f"Epoch {e+1}")
for i, (imgs, _) in enumerate(progressbar):
imgs = imgs.cuda()
bs = imgs.size(0)
z = torch.randn(bs, z_dim).cuda()
fake_imgs = G(z).cuda()
real_out = D(imgs)
fake_out = D(fake_imgs)
fake_label = torch.zeros(bs, 1).cuda()
real_label = torch.ones(bs, 1).cuda()
loss_d = (
criterion(real_out, real_label) + criterion(fake_out, fake_label)
) / 2
D.zero_grad()
loss_d.backward()
opt_D.step()
# train for G
if e % 1 == 0:
z = torch.randn(bs, z_dim).cuda()
f_imgs = G(z)
fake_out = D(f_imgs)
loss_g = criterion(fake_out, real_label)
G.zero_grad()
loss_g.backward()
opt_G.step()
torch.save(G.state_dict(), "../checkpoints/G.pth")
torch.save(D.state_dict(), "../checkpoints/D.pth")
在训练过程中,记得常使用logging,opencv,matplotlib,pillow库对图像进行处理以及日志记录,同时每过几个epoch或步数就将模型参数保存下来,并将每个epoch的loss记录下来,使用tensorboard可视化等等.
结果展示
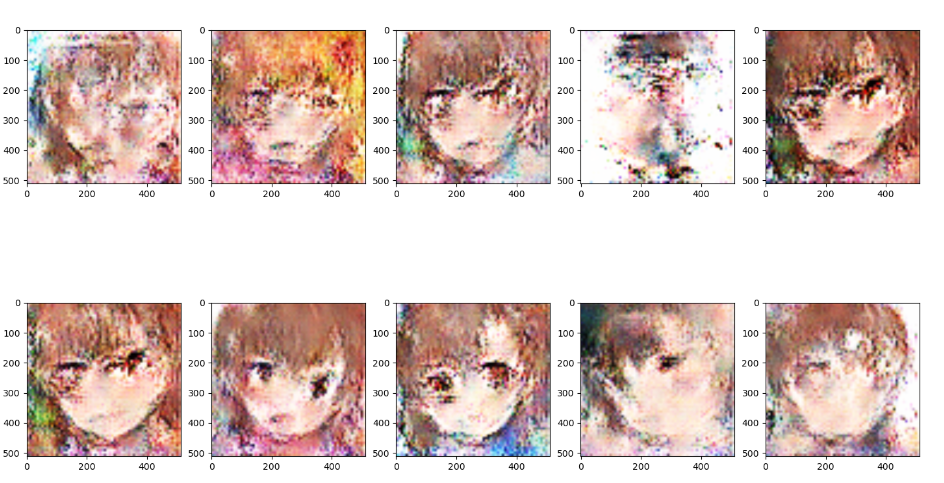
这里只训练了500个epoch,训练集也只有1000多张吧,效果还是将就.
后续会陆续更新到githubdrowning-in-codes/myGAN: learn GAN through self-taught (github.com)
reThink
这里只使用了DCGAN,可以考虑换一下其他GAN. 此外数据集的预处理也可以配合Pytorch做得更好. 另外由于是动漫头像数据集,需要分割爬取到的图片,这里使用训练好的算法爬取,肯定还是有一些错误率的,这个地方可以进行改进.比如下面这张图就分割错了.

可视化loss可以使用tensorboard或者visdom.
常用的GAN数据集还有MNIST,fashion-MNIST,Celeb,SVHN等等还有用于超分的数据集monet2photo,edges2shoes,可以换换数据集.
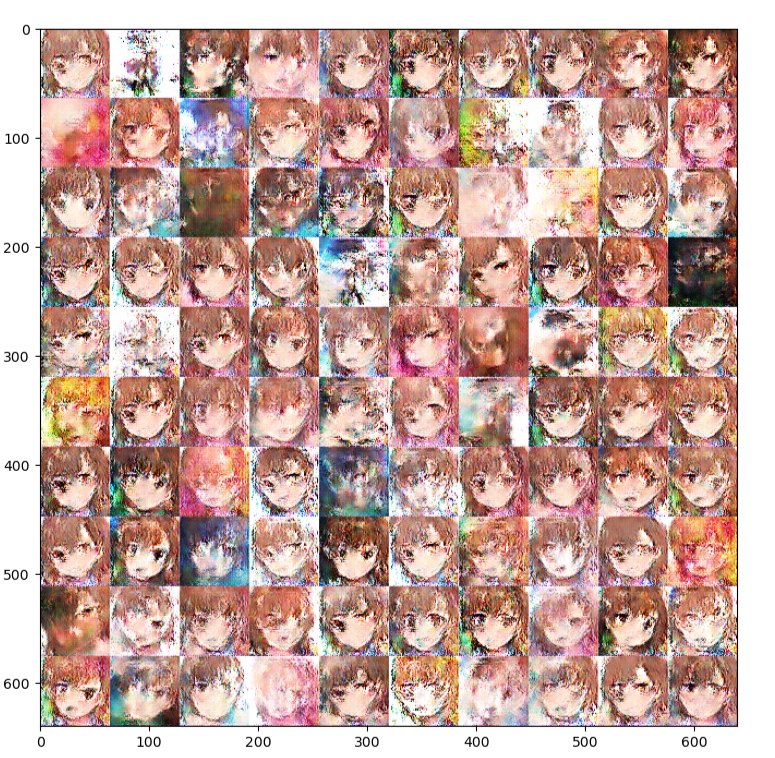
update:将图片增加后训练出来的模型出现了类似model collapse的情况,生成的图像十分单一.
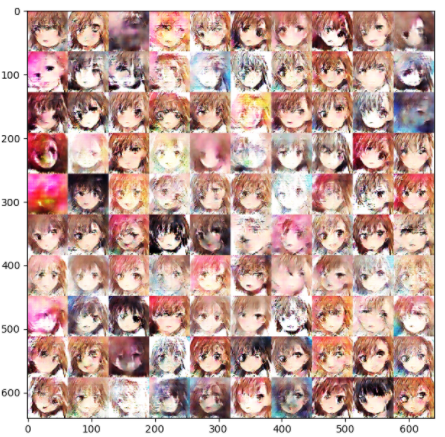
将epoch减小之后,model collapse不再那么明显了.
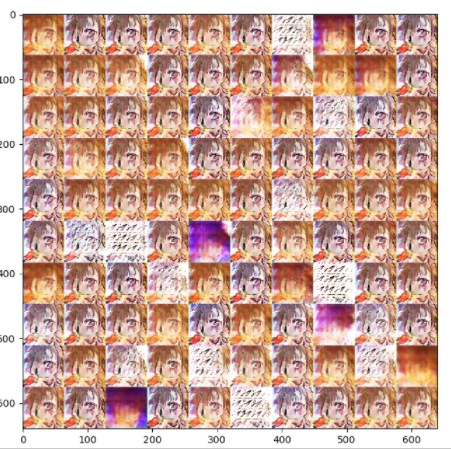
增大到一定值时又会出现这种现象.考虑使用PGGAN中估计标准偏差减少这种情况.